
Welcome to this Photoshop tutorial about creating a popular videogame mushroom icon. Here you will learn the easy step by step instructions on how to create the mushroom graphic straight from the popular Mario videogame. The neat thing about this is that once you learn how to do it, you can then customize the colors and shapes as you see fit. So you can apply these to your own flyers, poster prints
and even greeting card prints easily. Just carefully read the steps below
- First, setup your new document. The key important factor here is the resolution. For print graphics, it is essential that you use higher values for the resolution field. So when creating a new document, make sure you put in a value of 300ppi or higher. Take note that this will take up a lot more resources though. Once you have set this and the dimensions that you need, press OK.
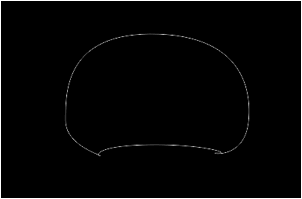
- Setup a dark background for your canvass using the pain bucket tool to fill it with black. This will help you see our mushroom icon better. Then press CTRL+SHIFT+N to create a new layer for our icon. Afterward, use the pen tool to create the initial top mushroom shape. In our mushroom shape, we use one anchor point on top, one each on both sides, and then three at the bottom to create the shape you see.
- Now, fill your new shape with a red color. In the paths panel, right click on your work path and then select the option to “Make Selection”. Choose a red color for your mushroom and then use the paint bucket tool inside your shape to add the color.
- Now, go to the blending options of your new layer by double clicking on the layer name itself. Once in the Blending options window, click on the checkbox for gradient overlay. Use a red, darker red, and red gradient with a 90 degree angle just like you see below.
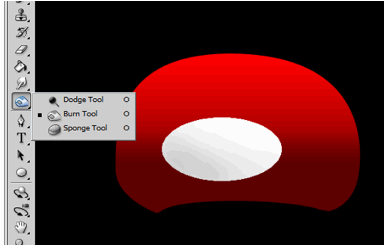
- Now we will add the additional white spots. Create a new layer and then change your foreground color to white. Using the elliptical marquee tool to create a round area in the mushroom shape. Fill it with a light grey color (f4f4f4).
- Next use the Burn tool to darken the bottom areas of our round shape, while use the Dodge tool to lighten the top areas.
- Duplicate the same process with a few more other spots. Do not worry about the circles going across the mushroom shape for now.
- Next, go back to your paths panel, and click on your original work path. Right click on it and click on “make selection...”
- Then, just select a 0 pixel feather radius on the window that opens. Once you press ok, you will see the outside of the shape of our mushroom is selected. Now, erase the overhanging white circle shapes to leave the original shape behind with the white spots. Just use a hard eraser brush type to do this.
- Now, create a new layer and then use the elliptical marquee too to create the bottom face part of our mushroom icon. Fill this one white a very light grey color as well.
- Use the burn tool on the edges of the shape, while should use the dodge tool on the center to get the right face composition.
- Now, use the rectangle tool to create a new thin rectangle shape like this.
- Now, press CTRL+T and then warp the rectangle a bit like so. Do this by right clicking on the rectangle after pressing CTRL+T and choosing the warp option in the context menu.
- Then, simply duplicate the layer by right clicking on your original rectangle layer and selecting the option to duplicate the layer. Afterwards, press CTRL+T on that duplicate shape, and the right click on it. Click on the option to flip horizontal and then place your other mushroom eye in the appropriate place.
- Great! That gives us our mushroom icon! Now you can change the colors easily for your custom designs.


Visit this site, Printplace.com, to read more about Graphic Design Tutorials.


Good to see easy way to create a awesome characters. Thanks
ReplyDeleteSuch a impressive tutorials. Great to see such a useful learning tips. Thanks
ReplyDeleteUseful tutorial. Great to learn icon design in such an easiest way. Thanks
ReplyDeleteThese are gorgeous,Thanks a lot they are great.
ReplyDeleteFree Photoshop tutorials
Good job...so easy to follow and understand!
ReplyDelete