
Flowers are great accents for your graphics, header/logo designs as well as actual printed themes and design elements. In this tutorial we will teach you how to create a very simple flower design in Adobe Illustrator. This technique will be perfect for you if you need a stylish flower design for items like poster prints, postcard printing and of course other digital print media where a flower logo or theme is needed. So just follow the step by step instructions below to see how you can do it yourself.
- Start by opening your new document and then clicking on the Arc tool.
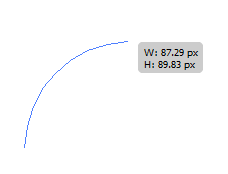
- Now, draw your first Arc like so.
- Then, draw a second arc, this time going to the opposite direction from the top to the bottom. End the arc in the starting point of the original arc.
- Now, let us join those points to make the petal into a shape. Go to your tools window and click non the Direct selection tool (Shortcut A).
- Click and drag the selection tool on the top end points of our arc. Right click on them and select “Join”
- Do the same with the bottom.
- Next, we will duplicate the petal in a radial fashion to create our flower. Simply select the rotate tool in your tools window. Make sure of course that the petal is selected.
- Make sure that you drag the rotation point to the bottom intersection of end points to make the radial effect successful.
- Next, hold down the ALT key, and drag the petal downwards. You should see a duplicate of the petal rotate along the point or rotation, Just place it where you need it along the rotation path.
- Now, press CTRL+D several times to complete the radial flower pattern of our flower.
- Once the radial distribution is done, select a couple of petals at random. Use the SHIFT key and then just click on a couple of those petals. Right click on those selected petals and choose Arrange -> Bring to front.
- This gives us a more natural looking overlapping of some of the petals.
- Next, select the ellipse tool.
- Draw a circle on the centre of our flower.
- Great! Now we have our Flower base!
- All that is left for you to do is to colour up the flowers with various colour gradients.
- Now you know how to make easy vector flowers in Illustrator.


Visit this site, Printplace.com, to read more about Graphic Design Tutorials.


All your posts are tutorials are superb!!!
ReplyDelete
ReplyDeleteGreat post i really appreciate this post because a student i really want to become aWeb Designer
and i think illustrator can help for web desinging and i'm looking also Wordpress Courses i was planning
to learn more about wordpress also. but anyways i will keep update your site for more free informative post. thanks for this post it helps me a lot.