
Looking at many of the newest websites today, you will see that many are turning to cartoon style illustrations. This is in line with the latest sleek, bright and cartoon like trends in web and print design. Now, even for newbies, it can be easy to create a cartoon animal face custom made for their own websites and even those looking to make their flyer printing, poster printing and postcard printing pieces more interesting. Using Adobe illustrator and a few custom shapes and flourishes, you can easily achieve this yourself. Here are the steps that you can try out to get a simple cartoon animal face in illustrator.
- First, let us start with the face. Use the ellipse tool to draw a standard circle.
- Make sure that you colour it with the approximate colour that you want for your animal face.
- Next, select the direct selection tool in your tool window.
- Click the bottom anchor of your circle to start moving that side downwards without altering the top part.
- For this tutorial, we are going to create a bunny. So we lengthen the bottom as a snout.
- Then, select the top anchor and move it a bit downwards to flatten the top part of our head.
- Afterwards, Press CTRL+C and then CTRL+V to duplicate what we have done.
- Change the duplicate’s color to a lighter shade. Then make it smaller a bit using the standard selection tool. Place it back to our original shape to get a lighter face on top of the head.
- Next, let’s make the eyes. From the outside of the head, use the ellipse tool again to create just one eye.
- Next, add two more circles, in white color that are smaller. One in the center and one on the top left side.
- Now, select all three circles and move it as one of the eyes of our face.
- Press CTRL+C and then CTRL+V to duplicate the eye. Once duplicated, position it as the other eye.
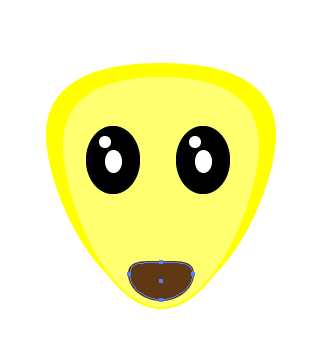
- Now, to make a nose, simply do the same process as we did with the face, only this time, you do not need to elongate the snout too much.
- Then, position the nose near the base of the snout.
- Now, on the side of your canvass first create the ears using the ellipse too.
- Duplicate it, reduce its size and change its colour. Use the simple selection tool to reduce its size correctly.
- Now, place this on the top of our face. Press CTRL+ [ to send it to the back of the face.
- Duplicate the ears by pressing CTRL+C and then CTRL+V again. Position the duplicate on the other side.
- Now, alter the angles of the ears to make them droop down. Right click on the ear elements, click on transform -> rotate... and select 45 degrees on the left, while -45 degrees should be set for the right.
- Great! Now we have a nice and simple bunny face vector.
- Now just alter the colors and styles to your taste of course.


Visit Printplace.com to read more about Online Printing Services and Graphic Design tutorials.


No comments:
New comments are not allowed.